Configuring Contact Form 7 Settings in WordPress
Welcome to our tutorial for configuring the Contact Form 7 settings in WordPress.
Contact Form 7 is a WordPress plugin that adds various contact forms for visitors who wish to contact the site owner or admin. Many themes already come installed with a contact page template, but for themes that leave this functionality out, Contact Form 7 is a free alternative. This plugin’s contact form is not pretty, but it is lightweight and gets the job done.
Installing and using Contact Form 7 is relatively simple, and we have put together this short tutorial to walk you through the settings and get this plugin working on your site within a few moments. Let’s get started, so just follow along with the step-by-step instructions and the screenshot images below.
Installing and setting up Contact Form 7
To get started, you must first install Contact Form 7 if you have not already done so. Hover your mouse over “Plugins” and click on “Add New.” Copy or type “Contact Form 7” into the search field provided.
Install and activate the plugin.
Once this plugin is installed, it will add its own dedicated tab in your dashboard, titled “Contact.”
When you click on this tab, it will take you to the following screen.

Click on the contact form title
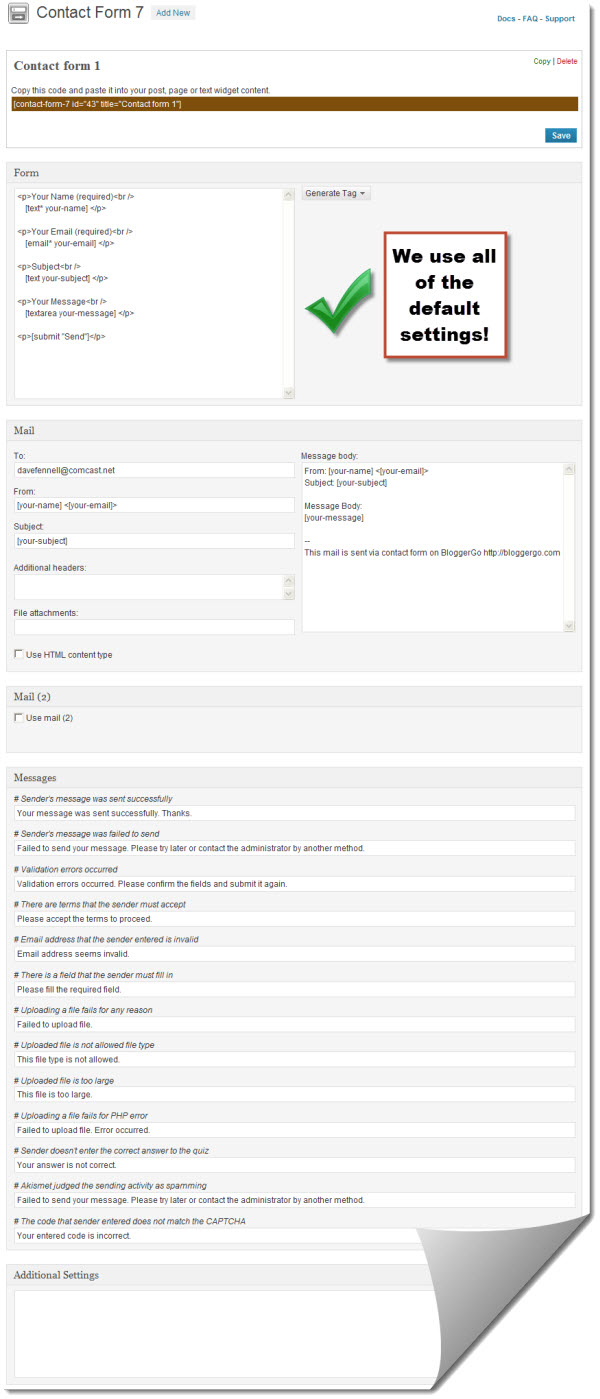
Click on the title of the contact form listed in those results, and this will take you to the Contact Form 7 settings page.

We have not changed a single option on this page!
There are quite a few settings on this page, but not to worry; we only use the default settings. There is not one field that we have modified on this page. Although, you might have different requirements, so scroll through this settings page, and make any edits that apply to your blog.
Click the blue “Save” button at the top when you are done.
How to add Contact Form 7 to your blog
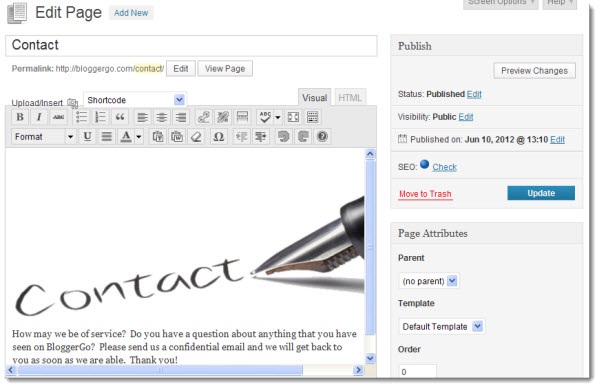
If you have not already done so, you’ll need to create a new contact page in WordPress. Navigate to Pages >> Add New

Adding a Contact Page to your Blog
Give your contact page any title that you wish, i.e., “Contact,” “Contact Us,” etc.
Then write whatever content you wish to include on your contact page. You might want to include a nice message, instructions, or any other content that you wish for your visitors to read before submitting their message. Images always add a nice touch as well.
Then head back to your Contact Form settings page and copy the line of code in the brown bar.

Copy the code that you see in brown
Then just simply copy this line of code in the exact location that you want it positioned on your new contact page.
Preview the page to ensure that everything appears at it should.
If everything looks good, publish the page and you will now have a fully functional contact page for your visitors to get in touch with you.
The Contact Form 7 plugin can also be used to add contact forms on any other page/post that you wish. Just simply go through the steps above, copy the new contact form code, and paste it on any post or page.


